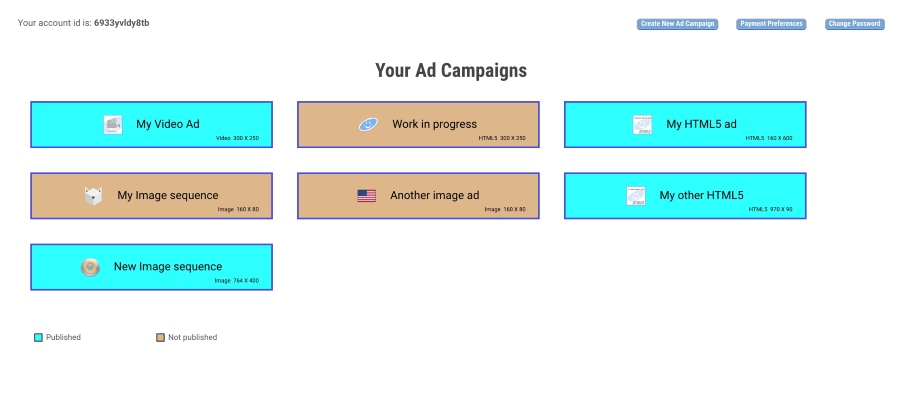
In order to modify one of your existing ad campaigns, you will need to log in and navigate to your AppyAds membership page. All the campaigns which you’ve previously created will be shown on the screen and will look similar to the illustration below:

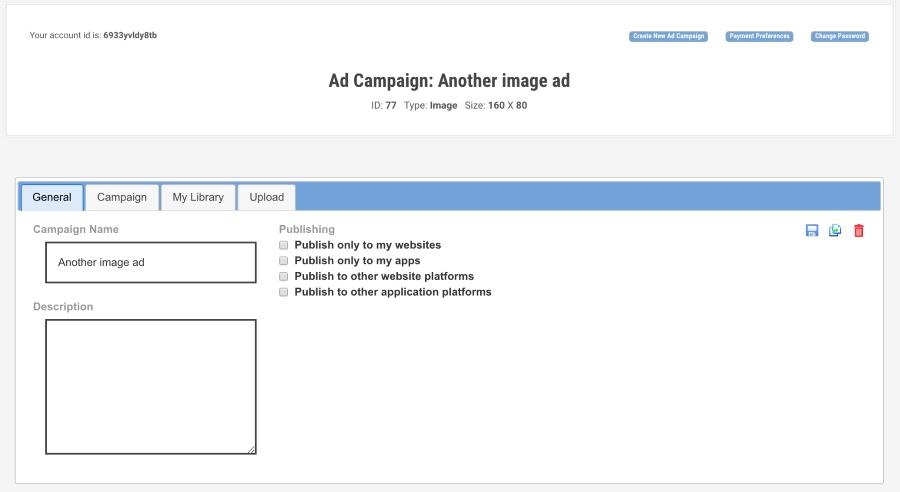
Simply click on the ad campaign you wish to modify and you’ll be taken directly to the Edit Campaign screen for that ad, which may look similar to the following:

In the top area, you’ll be shown your ad’s title along with it’s ID, type and size. Directly below, you should see an area divided into the following sections:
- General – Define the ad’s title and description, as well as publishing state.
- Campaign – Shows you a preview of the ad campaign and allows you to modify the behavior.
- My Library – Shows you all the files you’ve previously updated.
- Upload – Allows you to upload new files.
General tab
The title and description settings allow you to specify values that help you identify the ad. But mostly, these settings will not be used within the ad itself. One exception is when you add a video element to an ad campaign, the default title will be defined as whatever you’ve defined the campaign title to be (but you can always change it later if desired).
The publishing settings allow you to specify if and how the ad campaign is to be distributed. Note that all publishing options will disabled if there hasn’t been any campaign elements added to the campaign from the My Library tab.
- My websites – Check this box if the ad is to be published only to the account holder’s websites.
- My applications – Check this box if the ad is to be published only to the account holder’s mobile apps.
- Other websites – Check this box if the ad should be made available to websites owned by someone else.
- Other applications – Check this box if the ad should be made available to mobile apps owned by someone else.
The publishing options available to each campaign depend on the type of campaign. In general, the publishing options for each campaign type are:
- Image campaigns can be published to both websites and apps.
- HTML5 campaigns can only be published to websites.
- Video campaigns can only be published to websites.
Also, please be aware that the account member’s current Payment Preferences will also affect what publishing options are shown and how the campaigns are launched. (Please refer to the Publishing ad campaigns section for more information.)
After you’ve set any of the parameters in the General tab, please make sure you save the settings using the Save button in the upper right corner.

The Copy button allows you to copy the current ad campaign, include all image, video and/or HTML5 elements, to a new campaign. This makes creating new ad campaigns much easier and can save you time.
The Delete button deletes the ad campaign completely. Note that image and HTML5 elements are not deleted, but are always kept in the My Library tab, so that they can be used in other campaigns if desired.
Campaign tab
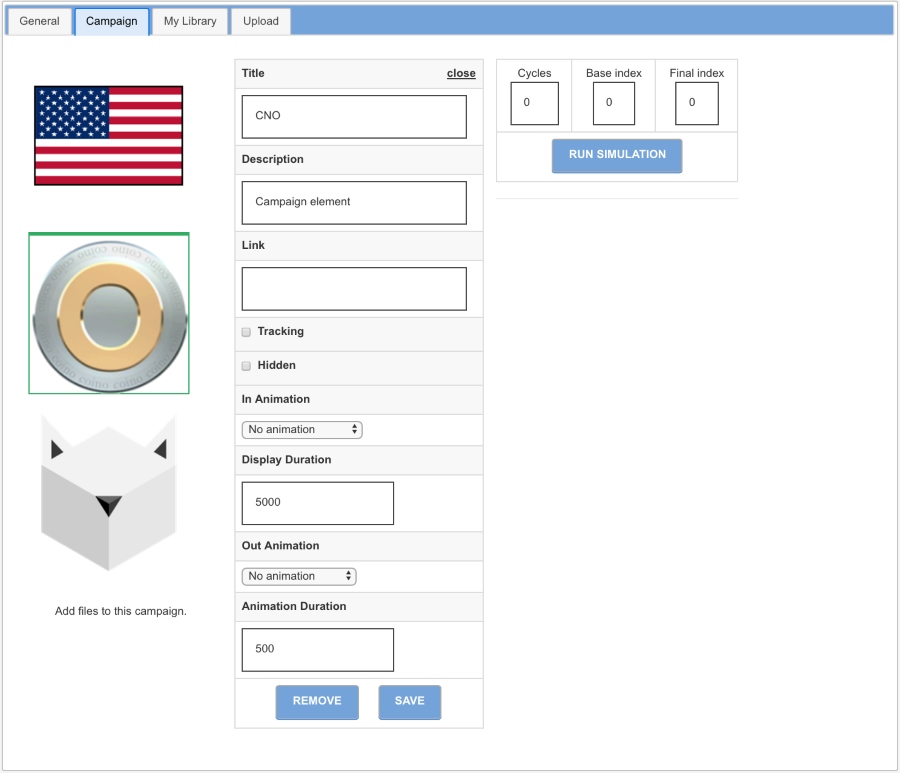
Within the Campaign tab, you will be presented with a view of what the current ad campaign looks like, as well as a list of all the elements that make up the ad.

On the left side, the column shows a sequence from top to bottom of all the individual image elements that make up the ad. (Note that if the campaign type was HTML5 or Video, then those elements would be shown instead.) To change the sequence ordering, simply drag and drop the elements where you want them to be. At the bottom of the sequence there’s a link for you to ad new elements from My Library as well. If you click on one of the image elements, a properties area is displayed, which allows you to change the behavior of the element (hyper-link when clicked, display duration, animation, etc.). If you change the sequence or any of the properties, please be sure you save the configuration using the Save button at the bottom of the properties area. (Note that you will not be able to change any of the properties if the campaign is currently being published in any way. In order to change the properties, the campaign must be unpublished from the General tab prior to making the desired changes.)
On the right side, you will see a section that allows you to run a simulation, showing you how the ad will look when published*. Additionally, you can set the following parameters, which govern how the ad campaign runs when published.
- Cycles – Determine how many times the campaign will repeat. A setting of 0 will result in the ad only running once, and not repeat the cycle. A setting of 5 will make the ad run once, then repeat 5 times. If you empty the cycle parameter or put any non-numeric value, the ad campaign will run continuously.
- Base index – The index of the image that will be shown first, after the first run-through. (The first run-through will always start at the first image, index 0.)
- Final index – The index of the image that will be displayed when the ad campaign finishes its cycles.
My Library tab
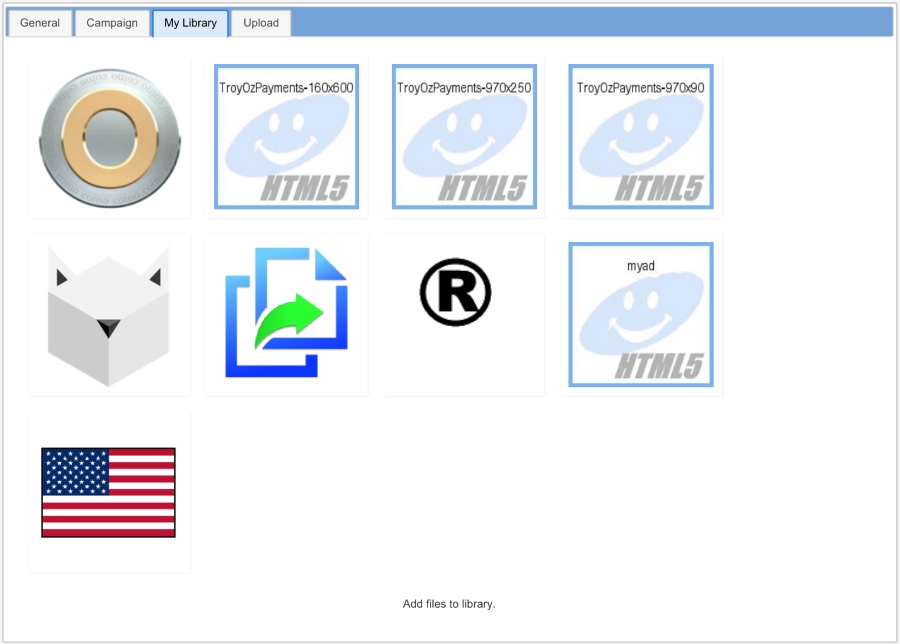
All files which have previously been uploaded will be shown in this tab. You will see all images and HTML5 packages that have been uploaded and available for inclusion into the current ad campaign being edited. (Note that you will not be able to add any files to the campaign if the campaign is currently being published in any way. In order to add new elements to the campaign, the campaign must be unpublished from the General tab prior to making additions.)

If you hover the mouse cursor over the elements, you will be presented with more information about each element, including more options to View the element, Add the element to the current campaign, or Delete the element from the Library.
Upload tab
Here you can upload images and HTML5 packages. (Accepted images are .png, .jpg and .gif types. HTML5 packages are standard .zip files containing all the assets needed to run such package.)


 Follow on Twitter